Monday, November 22, 2010

October Monster Cupcakes

Photobucket


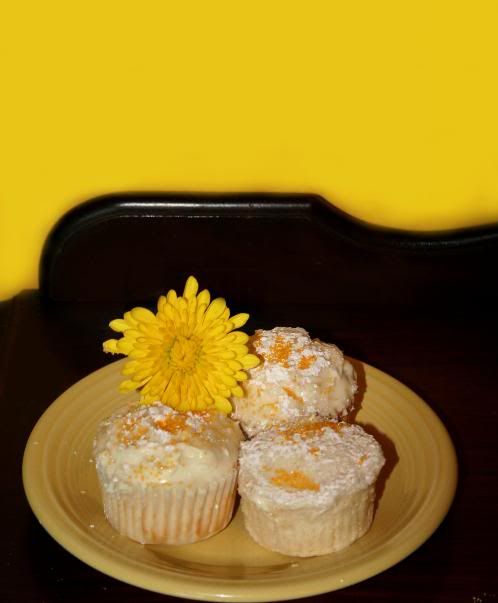
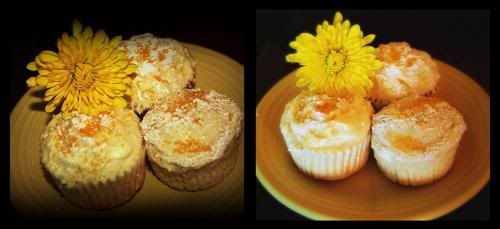
On October 23rd, I made some monster cupcakes inspired by Taste of Home Magazine's monster cupcakes.

I didn't use the article while I made my cupcakes, but I remembered the general idea of piping the frosting to look like fur.
I used Elinor Klivan's recipe called "Kid-Simple Cupcakes."


THE RECIPE:

Cupcakes
1 ¼ cups unbleached all-purpose flour
½ tsp. baking powder
½ tsp. baking soda
¼ tsp. salt
1 large egg
1 large egg yolk
1 cup sugar
½ cup canola oil or corn oil
1 tsp. vanilla extract
½ cup sour cream

Frosting
1/2 cup (1 stick) unsalted butter, room temperature
3 cups powdered sugar
1 tsp. vanilla extract
3 to 4 tbsp. whole milk

Make the Cupcakes
Pre-heat oven to 350 degrees. Sift all the dry ingredients together and set aside.

In a large bowl, using an electric mixer on medium speed, beat the egg, egg yolk, and sugar until thickened and lightened, about 2 minutes.

Stop the mixer and scrape the sides of the bowl as needed during mizing. On low speed, mix in the oil and vanilla. Mix in the sour cream until no white streaks remain. Mix in the flour mixture until the batter is smooth.

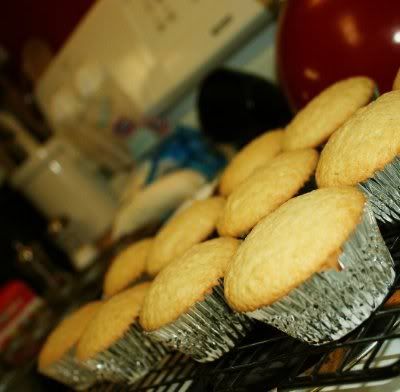
Fill each paper liner with a scant ¼ cup of batter, to about ½ inch below the top of the liner. Bake just until the top feels firm and a toothpick inserted in the center comes out clean, about 23 minutes. Cool the cupcakes for 10 minutes in the pan on a wire rack. Remove the cupcakes from the pan onto a wire rack and let cool completely.

(I usually try to remove the cupcakes after a few minutes and cool on a wire rack, for fear of them over-cooking in the hot pan.)

Make the Frosting:

In a large bowl, using an electric mixer on low speed, beat the butter, powdered sugar, and vanilla together with 3 tablespoons milk. Add up to 1 tablespoon more milk if needed to form a creamy, spreadable frosting.

I set aside a small cup of the white icing and then made the rest green.
I added almost an entire tube of green food dye. Getting a deep green took a while.

(I didn’t decorate as suggested in the recipe.)
Photobucket


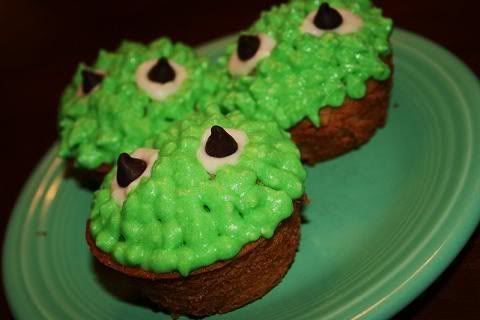
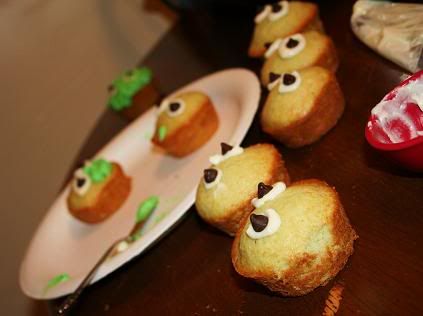
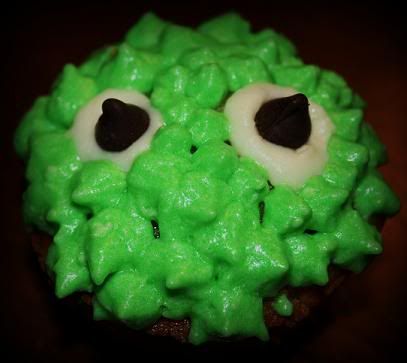
I used a spatula to make small white circles on each cake and placed chocolate chips for the eyeballs. I used a piping bag full of the green frosting and made small ball-shape squirts for the fur look.


THE FINAL PRODUCT:
Photobucket


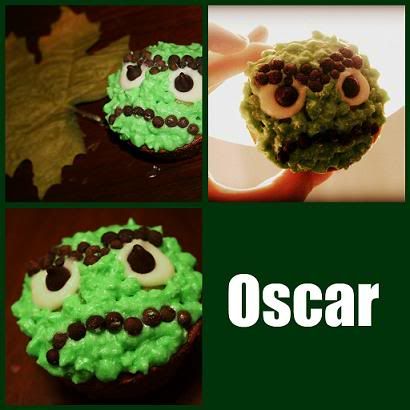
My sister and I made an Oscar the Grouch cupcake using Allspice peppers. (No one actually ate the peppers, it was just for fun.)
Photobucket


My opinions:
I think the cupcakes turned out quite cute. Some of the cakes looked a bit sloppy with the fur design (the balls blended into each other and looked bumpy rather than furry.) This was probably because the frosting was melting because the cakes were too hot. The cupcakes tasted good. They were fluffy and tasty, but very sweet. I would have preferred the frosting be more creamy than just soft and sugary.

COMMENTS AND CONCERNS:

Unfortunately, there was a mis-hap with one of the cupcakes. As my sister Amelia was eating one, she made a distressed exclamation. "Can you tell me why I have this THING in my cupcake?" She held a chunk of black plastic in her hand. I could hardly believe my eyes, but after investigating the KitchenAid, I saw what had happened. A knob above the bowl had broken in two. The other half must have fallen into my batter and remained there. How I never saw the chunk as it was stirring, and how I didn't notice it as I poured the batter into the liners, I have no idea. Nonetheless, Amelia claims she was traumatized.

My family agreed that the monsters looked cute and that the cakes tasted good.
My boyfriend enjoyed them as well. So did Ruth, who added that she especially thought the chocolate chips complimented the flavors well and that she would like even more on the cupcake next time I make these.

Friday, October 22, 2010

Spiderweb Pumpkin Ginger with Cream Cheese Frosting (10-18-10)

Photobucket


I had been wanting to do some Halloween-inspired cupcakes for this month and finally got around to doing it. I decided on Elinor Klivan’s Spiderweb Pumpkin Ginger cupcakes.

I did something new this time in baking; laid out my ingredients “miz en place:”

Photobucket


THE RECIPE:

Cupcakes
1 1/2 cups unbleached all-purpose flour
3/4 tsp. baking powder
3/4 tsp. baking soda
1/4 tsp. salt
1 tsp. ground cinnamon
1 tsp. ground ginger
1/2 cup unsalted butter, melted and cooled slightly
1 cup sugar
1 cup canned pumpkin
3 large eggs
1/4 cup crystallized ginger, cut into 1/8 – 1/4 inch pieces (I just used a dash of ground ginger because I didn’t have crystallized.)

I did this to cool the butter quicker:

Photobucket


Frosting
1/2 cup butter, room temperature
6 oz. cream cheese, room temperature
1 tsp. vanilla extract
3 cups powdered sugar
1/2 – 1 tsp. ground cinnamon
1 – 2 tsp. whole milk

Cupcakes
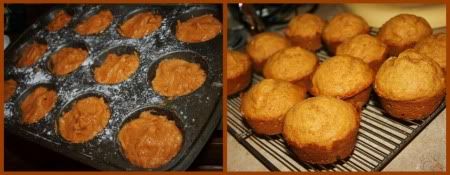
Pre-heat oven to 325 degrees. Sift all the dry ingredients together and set aside. In the bowl of an electric mixer, beat butter, sugar, and pumpkin until smooth. Mix in eggs and crystallized ginger, and then slowly mix in the dry ingredients until everything is incorporated. Spoon batter into your muffin tin. If you are using a silicone one, you can fill the cups all the way to the top. If not, place cupcake papers into a metal tin and fill halfway. Bake until firm, about 20 minutes or so. Cool on rack.

Photobucket


Frosting
Beat butter, cream cheese, and vanilla until smooth. Add powdered sugar until frosting is smooth and light.

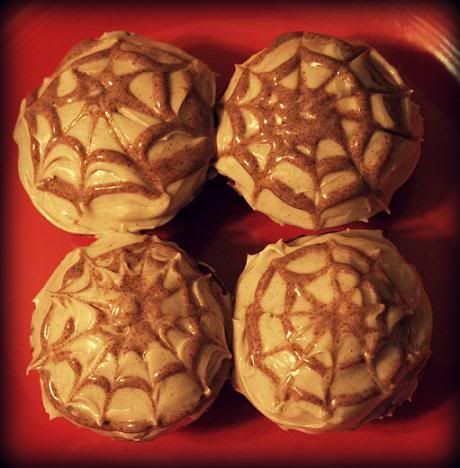
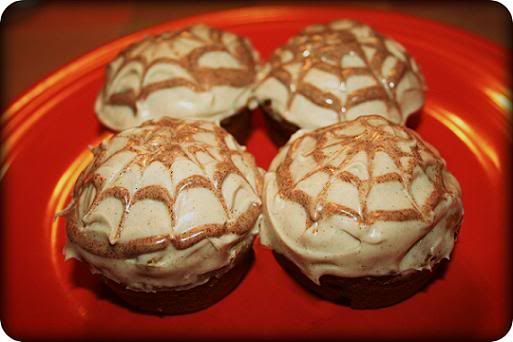
Set aside 1/4 cup of frosting, and mix cinnamon into this until it turns a light brown color. Add a touch of milk, so frosting is thick but pourable. Place in a sealable freezer bag with all air pressed out, and cut a tiny hole in one of the bag’s corners. This is now a makeshift pastry bag.

Frost cooled cupcakes with white frosting then, using the brown frosting, pipe a dot in the center of the cupcake, and two concentric circles around the dot. Drag a toothpick from the cupcake center to the edge to create the spiderweb pattern.


The spiderweb pattern was difficult only because my extra frosting for the design wasn’t firm enough. I kept trying to get the balance of milk and cinnamon right. I added too much milk and tried to harden the thing by putting it in the fridge… but I just didn’t get the right consistency. I was able to do the design, but it dripped down the sides a bit. I also would have liked the color of the webs to be darker. But overall, I was pleased with my attempt.

THE FINISHED PRODUCT:

Photobucket


COMMENTS AND CONCERNS:

My entire family was pleased with the results and thought the cupcakes were very good.
David’s mom said they were delicious and David liked them too.
I thought they tasted very good as well, but I would have liked there to be a stronger pumpkin taste. David thought there was a nice balance of flavors. But I would add more pumpkin next time I make these

Red Velvet with Cream Cheese Frosting (10-15-10)

Photobucket

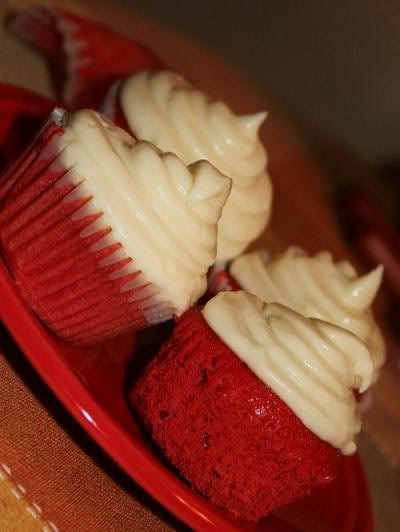
My boyfriend and I visited a Sprinkles cupcake bakery. I ordered the Red Velvet and it was just delicious. I was then inspired to make my own red velvet cupcakes. My sisters were dubious about this endeavor, since the last time that I attempted red velvet; they did not turn out well at all. I carried through with the plan anyway.

I did some research about red velvet, reading reviews on various recipes online. It seemed that reviewers were not happy about red velvet cakes that called for too much cocoa powder. Apparently anything over 1/4c cocoa powder is “too much.” This makes the cake too chocolate-y, when the chocolate taste is only supposed to be subtle. I decided to use a recipe that I found on foodgawker.com from annies-eats.com. The recipe is as follows:

Red Velvet Cupcakes

Yield: about 24 cupcakes

Ingredients:

For the cake:

2½ cups cake flour

1½ cups sugar

1 tsp. baking soda

1 tbsp. cocoa powder (I used a little more, trying to find a happy-medium between too much and too little)

1 tsp. salt

2 large eggs

1½ cups vegetable oil

1 cup buttermilk (we didn’t have buttermilk, so I made my own by mixing milk and vinegar together)

2 tbsp. (1 oz.) liquid red food coloring (Apparently the little tubes you get at the grocery store are less than 1 oz. So I didn’t use quite that much red.)

1 tsp. vanilla extract

1 tsp. distilled white vinegar

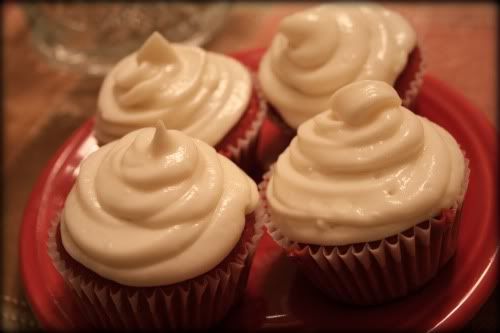
I used Elinor Klivan’s cream cheese frosting recipe that I usually use (found on my past posts).


Directions:

Preheat the oven to 350° F. Line cupcake pans with paper liners. In a medium bowl, combine the cake flour, sugar, baking soda, cocoa powder and salt; whisk to blend. In the bowl of an electric mixer, combine the eggs, vegetable oil, buttermilk, food coloring, vanilla and vinegar. Beat on medium speed until well blended. Mix in the dry ingredients on low speed and beat until smooth, about 2 minutes.

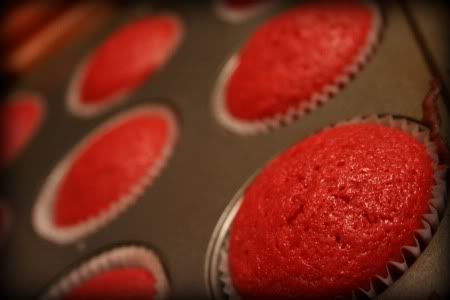
Divide the batter evenly between the prepared liners. Bake, rotating the pans halfway through baking, until a toothpick inserted in the center comes out clean, about 18 minutes. Let cool in the pans 5-10 minutes then transfer to a wire rack to cool completely.


Photobucket

Photobucket


THE FINISHED PRODUCT:


Photobucket

COMMENTS AND CONCERNS:


I had a love/hate relationship with these cupcakes. There was an undeniable bitterness to the cake, tasting like vinegar. This is either because the recipe calls for too much vinegar, or because the vinegar I used for the buttermilk made it too overpowering. My mom was doubtful that my buttermilk creation would be the cause, but I’m suspecting that was it. The taste of the frosting balanced out the bitterness, but not enough for some of my tasters.


As far as the texture goes, I would have probably benefited from removing the cakes from the pan earlier so as to prevent over-baking. They were fluffy, but not as moist as I would have liked.


My mom thought they were good, but was a bit reluctant in concluding that.

My dad said they were delicious.

Aubrey didn’t like them at all.

My boyfriend, David, tried to be nice and felt bad telling me the truth; he didn’t care for them either.

Kim said she could definitely taste the vinegar but it wasn’t bad. But I’m not sure if she actually liked it :p

I got used to the taste of the cupcakes, and when cold from refrigeration, I actually thought they were quite good. But about three days later, after having quite a few, they lost their appeal for me.

I want to try red velvet again but use less vinegar, or maybe even flavored vinegar.

Monday, September 13, 2010

Chocolate Cupcakes with Chocolate Buttercream Frosting (9-9-10)

Photobucket

On September 9th, I made chocolate cupcakes; my first chocolate batch. I used Elinor Klivan’s recipe for Chocolate Cupcakes with Chocolate Buttercream Frosting.

I was about to make these cupcakes on Friday, but realized that I didn’t have all the ingredients, at which point Kim told me that I should make the cupcakes when I actually had all the ingredients so that I wouldn’t have a long list of mistakes to put on my blog. Rather obvious, I know, but sometimes I get stuck in a plan and have trouble abandoning it. However, I did wait till I had all the ingredients and I think it paid off.

The process of baking these cupcakes was rather uneventful, that is, nothing tragic or miraculous occurred.

THE RECIPE:

Cupcakes:

  • 3 ounces unsweetened chocolate, chopped

  • 1 cup unbleached all-purpose flour
  • 1/2 teaspoon baking powder

  • 1/2 teaspoon baking soda

  • 1/4 teaspoon salt

  • 1/2 cup (1 stick) unsalted butter, at room temperature

  • 1 1/4 cups sugar

  • 2 large eggs

  • 1 teaspoon vanilla extract

  • 1/2 cup sour cream

  • 1/2 cup water

Frosting:

  • 3 ounces unsweetened chocolate, chopped
  • 2 ½ cups powdered sugar
  • 1 ½ tablespoons unsweetened Dutch-process cocoa powder
  • 1 ½ cups (3 sticks) unsalted butter, at room temperature
  • 1 teaspoon vanilla extract
  • ½ cup heavy whipping cream, at room temperature

Position rack in the middle of oven. Preheat oven to 350°F. Line 12 muffin tin cups with paper liners.

Make the cupcakes:


Put chocolate in heatproof bowl or the top of a double boiler and place it over, but not touching, a saucepan of barely simmering water or the bottom of the double boiler. Stir until chocolate is melted. Remove from the water and set aside.

(I melted the chocolate in a different and simpler way by Kim’s suggestion. I simply melted the chocolate in a frying pan on very low heat, constantly stirring so as to prevent the chocolate from burning. It took about five minutes to completely melt 3 oz. of chocolate)

Photobucket

Sift the flour, baking powder, baking soda, and salt into a medium bowl and set aside.. In a large bowl, using an electric mixer on medium speed, beat the butter and sugar until smoothly blended, about 2 minutes. Stop the mixer and scrape the sides of the bowl as needed. On low speed, mix in the melted chocolate. On medium speed, add the eggs one at a time, mixing until each is blended. Add the vanilla and beat until the mixture looks creamy, about 1 minute. Mix in the sour cream until no white streaks remain. On low speed, add half of the flour mixture, mixing just to incorporate it. Mix in the water. Mix in the remaining flour mixture until it is incorporated and the batter looks smooth.

Photobucket

Fill each liner with a generous 1/3 cup of batter to just below the top of the liner. Bake until the tops feel firm and a toothpick inserted in the center comes out clean, about 20 minutes. (I baked for about 25 minutes) Cool the cupcakes for 10 minutes in the pan on a wire rack.

Make the frosting:

(same process for melting chocolate)

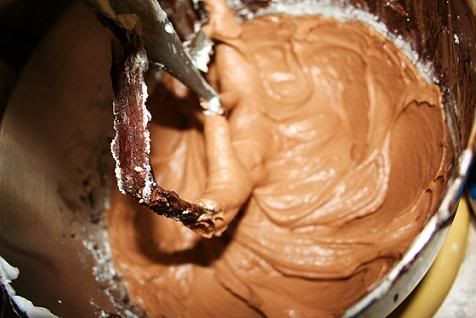
Sift the powdered sugar and cocoa powder into a large bowl. Add the butter and, using an electric mixer on low speed, beat until smoothly blended, about 2 minutes. At first the mixture will look crumbly, but then it will form a smooth mass. Beat in the melted chocolate. Add the vanilla and cream, mixing to incorporate. On medium speed, beat the frosting for at least 3 minutes, until it looks smooth and creamy and the color lightens. Use a small spatula to spread about 3 tablespoons of frosting of frosting on top of each cupcake, mounding the frosting in the center.

My method of using the frosting was a bit different.

As the book Hello, Cupcake! by Karen Tack and Alan Richardson teaches, you can use a Ziplock bag to pipe your frosting. Place your piping tip in the corner of the bag and cut a miniscule hole in the corner (about 1/16 inch or just eye-ball it to be a little smaller than the width of the narrow end of your tip). Position the tip so that it is held in place by the hole. Hold the bag in your hand and fold out about half of the bag. Spoon the frosting in to the bag, which is now supported by the palm of your hand. Fold the sides of the bag up again and fasten with a rubber band. Mine looks the opposite of professional, but it works.

Photobucket

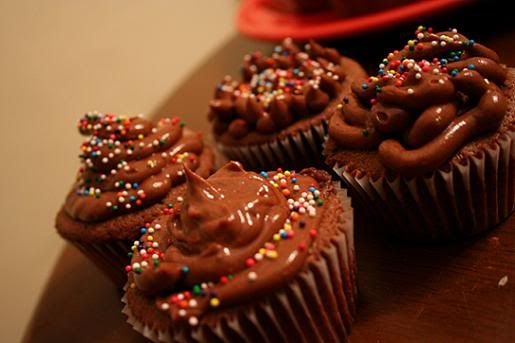
I used a Decorating Tip that I bought before this project. It’s Wilton’s #10 Round for balls, beads, and figure piping. Because it is a simple round tip, I thought it would be good for making a simple, dollop look. However, either because I was wrong about the tip, or because of the fact that the frosting was brown… the result resembled dog poo:

Photobucket

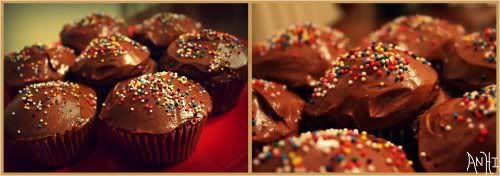
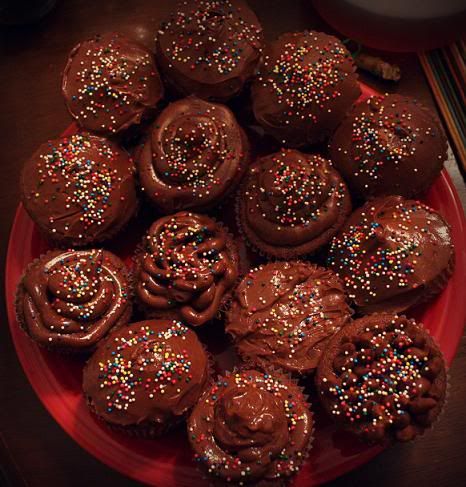
Thankfully, my new cake spreader, Wilton’s 9’’ Angled Stainless Steel Spatula, came to the rescue. I also added some sprinkles, after much deliberation about what to top them with.

THE FINISHED PRODUCT:

Photobucket

And the OTHER ONES:

(Or, the humorously ugly ones):

Photobucket

The entire batch:

Photobucket

COMMENTS/ CONCERNS:

Milly: Very good. I like how the taste of the cake and the frosting are different even though they are both chocolate flavored.

Kim: *smiles giddily and eats more* The cake is light and fluffy.

Owen: Some! More! Bite!

Aubrey: They are good, even though I don’t like chocolate. (In retrospect: I thought they were scrumpuous, but the frosting was a bit too soft.)

David: Oooh they look so good! (After eating: They are good! Mmm.)

Ruth: Yum!

My opinion: I thought the cupcakes tasted very good. The cake was moist and continued to stay moist a few days after. For being made with a lot of chocolate, they did not taste heavy or too sweet. The chocolate flavor was pure and very counter to the processed taste you would get from cupcakes at the grocery store. I attribute this to Baker’s Pure Unsweetened Chocolate.

The frosting should have been thicker, but it tasted good.

Also, I must add that some of the cupcakes had strange areas in the center that looked like gooey cocoa powder. This did not affect the taste, and I'm guessing was either due to the cupcakes being a bit undercooked, or, I did not stir the batter enough. Or maybe it was completely normal and I just don't know.

But overall, I deem the batch a success!

Monday, August 30, 2010

Vanilla Buttermilk Cupcakes with Butter "cream" Frosting (8-28-10)

Photobucket


On August 28th, I baked a batch of Vanilla Buttermilk Cupcakes with a Butter Cream frosting. I did this using a recipe I found on foodgawker.com which linked to happysugarfuntime.com by Anne Earley.

I didn't use nectarines or honey as the blog post suggests. I may have if I had nectarines and honey on hand, however. But I am trying to stick with basic recipes until I feel as though I have somewhat mastered them. I am waiting for a relatively smooth baking process before branching out to making filled cupcakes or using more elaborate recipes.


THE RECIPE as found on happysugarfuntime.com:

Vanilla Buttermilk Cupcakes:

Ingredients:

  • 2 whole eggs

  • 1 egg yolk

  • 1 teaspoon pure vanilla extract

  • 1/2 cup plus 2 tablespoons buttermilk or soy milk (150ml) (room temperature)

  • (I used soy milk)
  • 1 1/2 cups (180 g) flour

  • (I used cake flour)
  • 1 cup (200 g) sugar

  • (the recipe suggested using a little less)
  • 2 1/4 teaspoons baking powder

  • 1/4 teaspoon salt

  • 1/2 cup (1 stick) (115 g) unsalted butter or lactose free margarine, cut into cubes (room temperature)

  • (I used unsalted butter)
Preheat the oven to 350 degrees Fahrenheit (175 Celsius).
In a bowl, whisk together, the eggs, egg yolk, vanilla, and buttermilk and set aside.
Whisk together the flour, sugar, baking powder and salt. Cut in the butter cubes and mix with an electric mixer on low speed until you get little pea looking balls. Now add the wet ingredients. After that crank the speed up on medium and mix until the batter is fluffy.

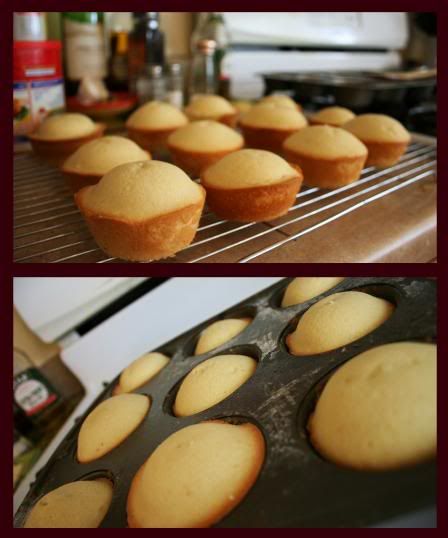
Portion the batter in your prepared paper lined muffin forms and bake 20-25 minutes and a toothpick comes out clean. Transfer them to a a wire rack to cool.
(I baked for about 22 minutes)

Vanilla Butter Cream Frosting:

Ingredients:

  • 1/2 cup (115g) lactose free margarine or unsalted butter, room temperature

  • (I used margarine).
  • 3 to 4 cups (300-400g) confectioners’ sugar

  • (I used three)
  • 1/4 cup (60ml) milk, or soy milk

  • (I used Silk soy milk)
  • 1/2 teaspoon pure vanilla extract, or vanilla bean

  • (I used vanilla extract)


With an electric mixer cream the butter and add the confectioner’s sugar, add milk and Vanilla and beat until light and fluffy for about 2 minutes. Use a piping bag with a big tip to decorate.


Photobucket

Though I was out of cupcake liners, I greased the pan with Crisco shortening and sprinkled on some flour. Well, actually, it was more like dumping flour... the spectacle made my cousin Elizabeth laugh. (I did shake off the excess into the sink.)
The cupcakes came out of the pan without hardly any trouble or resistance. I was quite pleased with this.

There was only MISTAKE for this project. But this mistake was both colossal yet mysterious in nature. Let me explain the Saga of the Buttercream:

Sometimes I question my sanity when it comes to finding things I need. So many times I will be in search of something and be convinced that it is missing. But when I do find it, I realize that it had not been hidden at all and was actually staring me in the face the whole time. This time, it happened twice.

When I "couldn't" find the vanilla, it wasn't a big deal. (Though I do feel bad about employing Elizabeth's help and getting her all befuddled in the search. We were so stumped that she checked the fridge. And at least one of us even checked the bathroom.) But lo and behold... the vanilla extract was in its proper place, obscured in the cabinet. How I missed it, I have no idea...besides the nagging thought that I may be insane.

But the real travesty was when I "couldn't" find the powdered sugar. Now, I don't know much about baking besides a few basics and what I have learned through experience. And so, I was not aware until it was too late that granulated sugar is not an okay substitute for frosting. The frosting was inexcusably grainy. I later learned that if you need to use granulated sugar, you must at least blend it to powder first. I was reluctant to trash the stuff, as I am with most food items. And so Elizabeth and I spent some time weighing our options. By Elizabeth's suggestion, we put the frosting in the microwave for about a minute. It was considerably less grainy. I then put the frosting in the fridge to have it stiffen up. After some time, I tried the stuff and the grainy-ness was absent! I let it alone to chill some more.

It was then that I heard from the back of the kitchen, "Abby..." It was Amelia, "The sugar just sunk to the bottom of the bowl." And she was right. It wasn't grainy anymore because all of the sugar fell to the bottom. As soon as I stirred it up, it was the same grainy texture.

And then I heard another voice from the other end of the kitchen: "Abby!" It was Aubrey, "What in the world were you thinking?! The powdered sugar is right here!!"

It was then that I knew I was insane. I trashed the messed-up frosting and decided to start over.

I started over, this time using margarine instead of another stick of butter (for fear that I would waste even more real butter. *Sigh*).

But alas! For some reason that I do not understand, the frosting was the consistency of broth. Either the margarine was too soft... or the room too hot... or I over-stirred... or I accidentally used too much milk... or not enough sugar (I didn't want to overdo the sugar. Even if it had stiffened up, too much sugar would have made it too sweet for my liking) ... I am not sure what went wrong. All I know is that it was not butter cream that I had produced.

But I used it anyway, supposing that it could be more of a glaze. The "glazing" process was terribly messy... the "glaze" dripped down the sides of the cupcakes and went all over the place. (Yes, the cupcakes were quite cooled at this point.)

Mid-way through, I began to poke out indents in the tops of the cakes so as to "pool" the glaze. This made less of a mess than before.

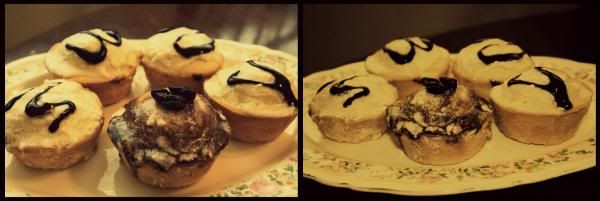
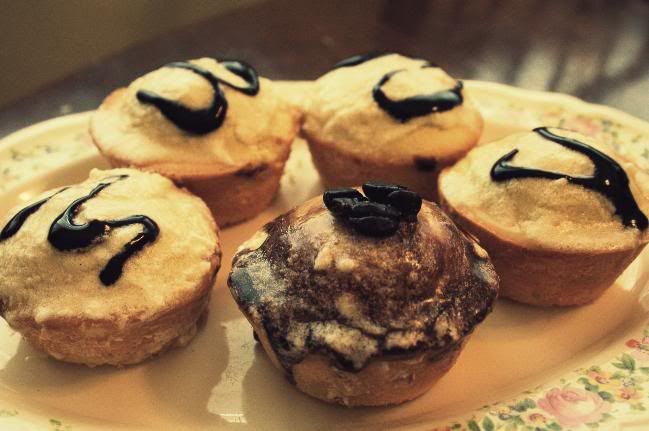
The presentation was abysmal and needed some contrast of color. I made zig-zag designs on the cakes using chocolate syrup. This was void of finesse and therefore resulted in either over-chocolated cupcakes, or dripping zig-zags. For one of them, I smeared the syrup around and put a few coffee beans on top. This was a pathetic attempt at sprucing things up, seeing that the cupcakes have nothing to do with coffee. I picked out the best of the worst and did my little photo shoot. The pictures turned out fairly nice.. but the cupcakes are obviously decorated sloppily.

THE FINISHED PRODUCT:

Photobucket


COMMENTS AND CONCERNS:

  • Amelia: They taste good and the cake is fluffy! But the frosting is a fail. And the chocolate overpowers the flavor.

  • Aubrey: The cake is good but the frosting is kind of a fail. And no, the chocolate doesn't overpower it!

  • Elizabeth: The cake is very good and moist. It could have been more moist if you had added something like sour cream or cooked them less, but still, they are moist. I like cake that is not very sweet and these cupcakes are good because they aren't too sweet. I think I'd prefer them with a not-too-sweet frosting to match. The chocolate added a difference in flavor that was nice.

  • Baby Owen: Bite! Please. More. Please. Bite! Please.

That following Monday (Saturday-Monday):
  • Amelia: These are not good at all.

  • Mother: Um...Honey, I'm sure they were good when you first made them... but they aren't now.
I can account for their quality on Monday; I didn't properly store them to preserve freshness. (I didn't think they were all that bad, but they had dried out considerably).

My personal opinion is that the cake texture was great. Moist and almost a bit spongy (which I like a lot.) They were also very clearly vanilla- flavored. The vanilla came through in a noticeable yet subtle way. The flavor of the frosting was good, though obviously not as it was meant to be. And I would have preferred much less chocolate syrup on top.

Next time I bake, I may use one of the same cake recipes I have used before and shall attempt to make a successful butter cream frosting.

Wednesday, August 25, 2010

White Cake with Cream Cheese Frosting (8-16-10)

Photobucket

On August 16th, I made another batch of cupcakes. This time, I used the Elinor Klivan’s recipe for White Christmas Cupcakes. The original recipe includes a white chocolate frosting with white chocolate shavings as garnish. But I just wanted the white cake batter, so there was nothing Christmas-y about my cakes. Instead of the white chocolate frosting, I used Elinor Klivans' basic cream cheese frosting that she uses for a couple different cupcake recipes.

THE RECIPE/S (as found in “The Cupcake Deck” by Elinor Klivans.):

Cupcake Ingredients:

  • ¼ cups cake flour
  • 3/4 teaspoon baking powder
  • 1/8 teaspoon salt
  • 3/4 cup whole milk
  • 1 teaspoon vanilla extract
  • 1/4 teaspoon pure almond extract
  • 6 tablespoons (¾ stick) unsalted butter, at room temperature
  • 1 cup sugar
  • 3 large egg whites, at room temperature

  • Make the cupcakes:


    Position a rack in the middle of the oven. Preheat the oven to 350°F. Line 12 muffin tin cups with paper cupcake liners.


    Sift the cake flour, baking powder, and salt into a medium bowl and set aside. In a small bowl, stir the milk and vanilla and almond extracts together.


    In a large bowl, using an electric mixer on medium speed, beat the butter and sugar until smoothly blended and lightened in color, about 3 minutes; the mixture will look sugary and form large clumps. Stop the mixer and scrape the sides of the bowl as needed during mixing. On low speed, add the flour mixture in 3 additions and the milk mixture in 2 additions, beginning and ending with the flour mixture and mixing just until the flour is incorporated and the batter looks smooth. Set aside.


    In another large bowl, beat the egg whites with clean beaters on medium speed until foamy, about 30 seconds. Beat on high speed until the egg whites look shiny and smooth and the beaters form lines in the egg whites. If you stop the mixer and lift up the beaters, the whites should cling to the beaters. Stir about one-third of the beaten egg whites into the reserved batter. Use a rubber spatula to fold in the remaining egg whites just until blended.


    Fill each paper liner with a scant ⅓ cup of batter, to about ¼ inch thick from the top of the liner. Bake just until the tops feel firm and a toothpick inserted in the center comes out clean, about 20 minutes. Cool the cupcakes for 10 minutes in the pan on a wire rack.

    Frosting Ingredients:

    • ½ cup (1 stick) unsalted butter, at room temperature
    • 6 ounces cream cheese, at room temperature
    • 1 teaspoon vanilla extract
    • 3 cups powdered sugar
    • Directions:

      In a large bowl, using an electric mixer on low speed, beat the butter, cream cheese, and vanilla until smooth and thoroughly blended, about 1 minute. Stop the mixer and scrape the sides of the bowl as needed during mixing. Add the powdered sugar, mixing until smooth, about 1 minute, then beat on medium speed for 1 minute to lighten the frosting further.

      (The cupcakes must be refrigerated so that the cream cheese won’t go bad)

      I sprinkled powdered sugar and then yellow sprinkles on the top of my cupcakes to add color. This wasn’t so efficient because those toppings didn’t stick as well as I had liked.

      And as for my MISTAKES, they are as follows:

      • Making the cupcakes in the middle of the day when it was hottest outside. The oven heated up the entire house and did not please my family.
      • In pursuit of softening the butter, I put a stick in the microwave. However, what I failed to realize was that the butter was wrapped in tin foil. After the first second, a bright flash shone from behind the microwave door and I heard an ominous ZAP! I flung open the door and the tin foil was on fire. The flame quickly dwindled down on its own, though. So I was thoroughly freaked out… But my parents calmly told me to just take it out and soften it on a plate without the tin foil. I recovered.
      • Being reluctant to get out the electric hand mixer for the egg-whites. I tried to just use a whisker because I thought it was pointless to go through all the hassle of getting out the electric one… but as my sister Amelia pointed out to me, that wasn’t okay.
      • I skipped using almond extract because we didn’t have any.
      • For the frosting, I didn’t soften the butter and cream cheese well enough. When I tried to blend them, the KitchenAid was shaking because they were so hard. In the end, the frosting tasted good, but I wish I had taken the time to make sure there weren’t any little balls of butter in it.
      • I used a Ziploc bag for my frosting squeezer and the opening on my tip was too small. The Ziploc bag method became very messy like last time, and the tip was too small for the thickness of the frosting. I took the tip out and just squirted the frosting on through the hole in the bag. This did not look good, so I ended up just spreading the frosting on instead of making a cool-looking dollop.

      THE FINISHED PRODUCT:

      Photobucket

      COMMENTS AND CONCERNS:

      Amelia: They’re good.

      Mother: Mmmm. Good.

      Aubrey: Eh…good. But the cake is tasteless. They’re good, but without the frosting, they’d be disgusting.

      I brought some of the cupcakes to my boyfriend, David’s, house. His parents agreed that the cupcakes are good and enjoyable.

      After David’s first bite, he exclaimed “MMMM! Oh my. So good.” And he ate a second immediately after finishing the first.

      My opinion of the cupcakes was that the cake was very moist and of a good texture. They were so moist that the cupcake liners peeled right off with barely any resistance. (I don’t know if that’s technically a good or bad thing.) But I agree with Aubrey that the cake didn’t have much flavor like the yellow cake did. This may have been due to the fact that I left out the almond extract. Or maybe the cake is meant to be rather bland because the intended white chocolate frosting is very flavorful (I don’t know.)

      The cream cheese frosting was delicious, I must say. I love cream cheese frosting because it doesn’t feel like you’re eating a lump of sugar. It’s the right mix between sweet and savory for a dessert.

      Until next time!

Saturday, August 7, 2010

Cupcakes from August 6th


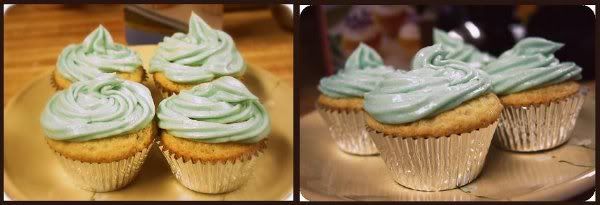
(Spring Bouquet Cupcakes made August 6th)

It may have been inspired from the new show, Cupcake Wars , or by hearing about the new idea of having cupcakes at weddings instead of a big cake, or just by random ideas... that I decided to take up the hobby of baking cupcakes.

My first attempt was Red Velvet Cupcakes. This turned out to be somewhat of a disaster, primarily because I didn't have the right ingredients. Yes, I am aware that that is quite a vital element in baking, but I was eager to do something and was at the same time, too impatient to wait for the ingredients. I also assumed that the things we didn't have could be easily substituted. I was incorrect. The cupcakes crumbled to pieces when I took them out of the pan and were peculiar in taste due to the hint of raspberry iced tea (a substitute that was not entirely my idea.)
Following my belief to waste as little as possible, I made an ice cream cake with the crumbs. It was all right, but not good enough to try again.

My second attempt was Yellow Cake with Cream Cheese Frosting. I was quite fond of the frosting, but the cake itself was dry. I think I over-cooked them.

My third, and most recent attempt was, by far, the best yet.

My boyfriend, David, bought me "The Cupcake Deck" by Elinor Klivans. It's a box of 25 cupcake recipes.

The ones I made first are called "Spring Bouquet Cupcakes." I know it's not Spring and I didn't include the bouquet part (using edible flowers as garnish.) I chose this recipe because it seemed like a good and simple one to start with. I made the cupcakes at my friend Kim's house. :)

As I began the task, my two sisters crowded around me, watching my every move.
"You know, it's rather awkward doing this when you're crowding me," said I.
"Yes, but we're just making sure you're doing all right," said Aubrey.
"Why?"
"Well... you just tend to make a lot of mistakes. And we want these to be good."
Eventually, they let me alone.

And I did make mistakes. They are as follows:
  • Used one egg-white instead of one egg-yolk. My sister, Amelia, caught my mistake after the fact. "I see yellow in the sink. That must mean that you used egg-white instead of the egg-yolk. Oh, Abby."
  • I put too much salt in the frosting by accident and therefore had to add a lot more sugar to balance it out. This made the frosting a bit overly-sweet.
  • Burnt my left index finger on the baking pan as I took it out. (small burn about the size of a pebble.)
  • I should wait a little longer before putting on the frosting. It melted on some of the cakes.
  • Next time I use a frosting squeezer, I will try to do it more efficiently. It became a very messy task.

And now for THE RECIPE:

Batter for 12 regular cupcakes, 9 big-top cupcakes, 6 extra-large cupcakes, or 42 mini-cupcakes
Cupcakes:

1 1/4 cups unbleached all-purpose flour (I used half cake-flour and half all-purpose. It seems that Elinor Klivans uses all-purpose, whereas, other cupcake recipes use cake-flour. I found that using cake-flour made the cupcakes more light and fluffy, as opposed to dense and thick.)
1/2 teaspoon baking powder1/4 teaspoon baking soda
1/4 teaspoon salt
1 large egg1 large egg yolk
1 cup sugar
1/2 cup canola or corn oil
1 teaspoon vanilla extract
1/2 cup sour cream

Frosting:
1/2 cup (1 stick) unsalted butter, at room temperature
2 tablespoons vegetable shortening, such as Crisco, at room temperature
1/8 teaspoon salt2 1/2 cups powdered sugar
5 tablespoons heavy whipping cream
1 teaspoon vanilla extract1/2 teaspoon almond extract

Position a rack in the middle of the oven. Preheat the oven to 350 degrees F. Line 12 muffin tin cups with paper cupcake liners.
Cupcakes:
Sift the flour, baking powder, baking soda, and salt into a medium bowl and set aside.

In a large bowl, using an electric mixer on medium speed, beat the egg and yolk (or eggs, for the larger quantity) and sugar until thickened and lightened to a cream color, about 2 minutes. Stop the mixer and scrape the sides of the bowl as needed during mixing. On low speed, mix in the oil and vanilla until blended. Mix in the sour cream until no white streaks remain. Mix in the flour mixture until it is incorporated and the batter is smooth.

Fill each paper liner with a scant 1/4 cup of batter, to about 1/2 inch below the top of the liner. Bake just until the tops feel firm and a toothpick inserted in the center comes out clean, about 23 minutes. Cool the cupcakes for 10 minutes in the pan on a wire rack. Remove the cupcakes from the pan onto a wire rack and let cool completely.


Frosting:

In a large bowl, using an electric mixer on low speed, beat the butter, vegetable shortening, and salt to blend them. On low speed, beat in the powdered sugar, cream, vanilla, and almond extract until smoothly blended, then beat on medium-high speed for 1 minute to lighten the frosting.

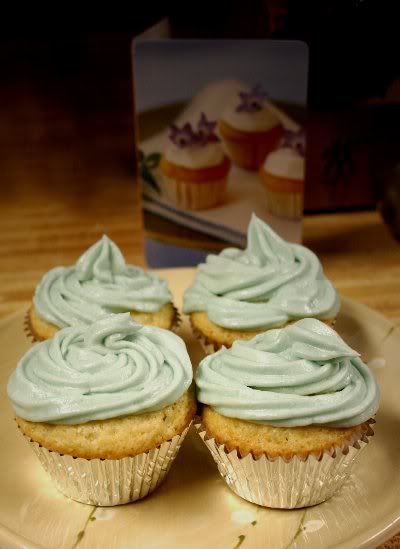
Kim suggested I use some food dye to make the frosting interesting. I used a few drops of blue.

Using a thin metal spatula, spread about 2 tablespoons of frosting evenly over the top of each cupcake.
(I used a frosting squeezer. It was incredibly messy.)


THE FINISHED PRODUCT:


COMMENTS AND CONCERNS:

Aubrey: "Mmmmmm. Very good. Delightful. Ahh, I see a bright future for these cupcakes... I also see some fat, fat, people."
Kim: "Yes, very good. The cake is very buttery."
Amelia: "They're good. But the frosting is too sweet."
Mother: "They were good, Abby...but to be honest, the frosting was just too sweet. I couldn't eat it all. Well, actually, I did eat it all, but still..."

And my assessment is that the cake was just the right texture and was moist. The frosting was good, but yes, too sweet. If I hadn't added too much salt and therefore too much sugar, it would probably have been better.

I took and edited the photos, another hobby of mine. I love how food looks on foodgawker.com and I want to model that with the photography of my cupcakes.

Well, that's all for now!