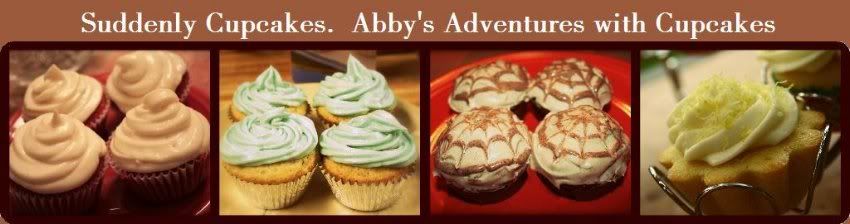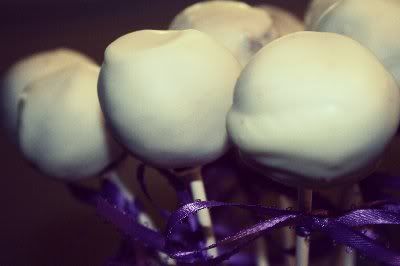
For my friend Hilary's bridal shower, I decided to make and bring cake pops! I had never made cake pops before, and so this was a risk. I won’t lie, the process involved much frustration and snafoos. My mom was my devoted assistant, for I desperately needed one.
It's a pretty in-depth process and the instructions are long. I used one of the cake pop recipes at Bakerella.com. (She has such adorable cake pop and baking ideas!)
Here are those directions with several of my comments/changes intermixed:
My comments= italicized
Notice: Because I hate it when I start making something and didn’t realize that a few steps down it says to chill something for a long time…
FOR BEST RESULTS: Your cake balls should be put in the freezer either overnight or for several hours.
My cake pops were red velvet cake with white candy melt.
 Ingredients:
1 box cake mix (cook as directed on box for 13 X 9 cake)
1 can frosting (16 oz.)
- I used cream cheese frosting, almost the whole can. It probably could have worked with the entire can
Wax paper
Candy melts (1 lb. pkg.)
- You can find candy melts at JoAnne's, Michaels, and probably other craft stores. The common brand is "Wilton" and they come in 14 oz bags. I found some at Target, but a different brand and they only had white. The craft stores should have multiple colors. I ended up needing two 14 oz. bags.
Lollipop sticks
- Found at Michaels and, I'm sure, other craft stores as well
- You will also need a block of Styrofoam (not too firm) or floral foam (to dry the cake pops on).
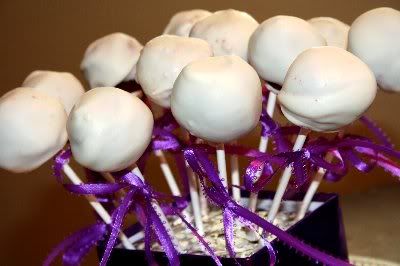
After cake is cooked and cooled completely, crumble into large bowl.
- I used a spatula and scooped the cake into a bowl, then crushed into small chunks about the size of dimes and smaller.
Mix thoroughly with 1 can frosting.
- I scooped the frosting in the bowl and worked it in with my fingers. This is suggested by the recipe on the site, but is very messy. The spatula just wasn't doing the job for me.
Roll mixture into quarter size balls and place on wax paper covered cookie sheet.- My balls were bigger than quarter sized and so we only got about 30 balls instead of 45-50 like the recipe says. It all depends on your choice for the ball to stick-length ratio.
- Here is where I would change the recipe. The recipe says to melt the candy melts next, but I would put a different step first:
Dip the tip of your lollipop stick in the frosting and insert that end into the cake balls. Insert a little less than halfway.
- The frosting creates a cement for the stick in the ball.
Place the cake balls with sticks in the freezer to firm up.
- Initially, I put them in the freezer for 15 minutes. But this was not long enough and the balls fell off the sticks when dipping. I tried about 15 minutes more and they worked better but still with some mess-ups. I finished the project in the morning having froze the remaining balls overnight. This resulted in zero issues with the cake slipping off the stick. If you have the time to freeze them, I would recommend it. But you may just have to do some trial-runs with extra cake pops to see what works for you.
Once the cake balls are firm....
Melt candy melts in the microwave per directions on package. (30 sec intervals, stirring in between.)- The directions may say to melt the candy melts in the bag, but you should melt them in the bowl that you want to use for dipping the cake balls in. We used a bowl that was deep enough to half-way submerge the cake ball, but shallow enough to spin the cake ball around. I'll explain this later. You should try to make sure that the melted candy melt consistency is pretty watery. About a minute and a half to two minutes in the microwave worked for me. If it's too thick, it will be too heavy on the cake ball.
Once firm, carefully insert the cake ball into the candy coating by holding the lollipop stick and rotating until covered. Once covered remove and softly tap and rotate until the excess melted candy falls off. Don’t tap too hard or the cake ball will fall off, too.- I rolled the cake ball by slowly spinning the stick around the circumference of the bowl. Depending on the depth of the candy melt, you may have to tilt the bowl to get the candy melts to cover the underside of the ball.
- It is difficult to get the candy melt on the balls to be smooth, but the wetter the candy melt and the more you spin the excess off, the more smooth the will be. But that all depends on what you want the look of them to be. Smooth vs. imperfect.
Push the sticks down in a styrofoam block to dry.
- We used floral foam because the styrofoam we tried to use was too firm to stick the sticks into easily.
The candy melts dry quickly.
- For my presentation I cut floral foam to fit inside decorative boxes and covered the foam with tin foil. We placed the foam in the boxes and stuck the cake pops in it. We tied ribbon bows on each pop. There are several ways to display cake pops, and you can look some images up on the Internet to find them.
I know this is in-depth, but it’s definitely worth it because they are just delicious!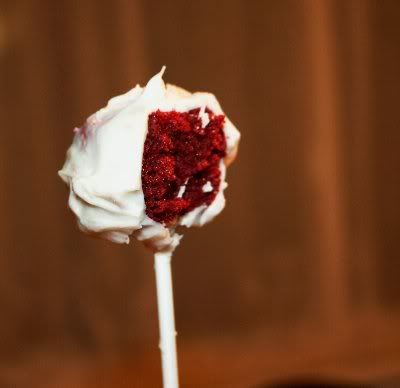
It was very encouraging the night of the shower because I got a lot of positive feedback. Several people were raving about them and wanted to keep eating more. This is the response I want for anything I make :)